
Tile and layout
Material, pattern, height and exposed edges shape the finish.
KITCHEN BACKSPLASH INSTALLATION IN DENVER, CO
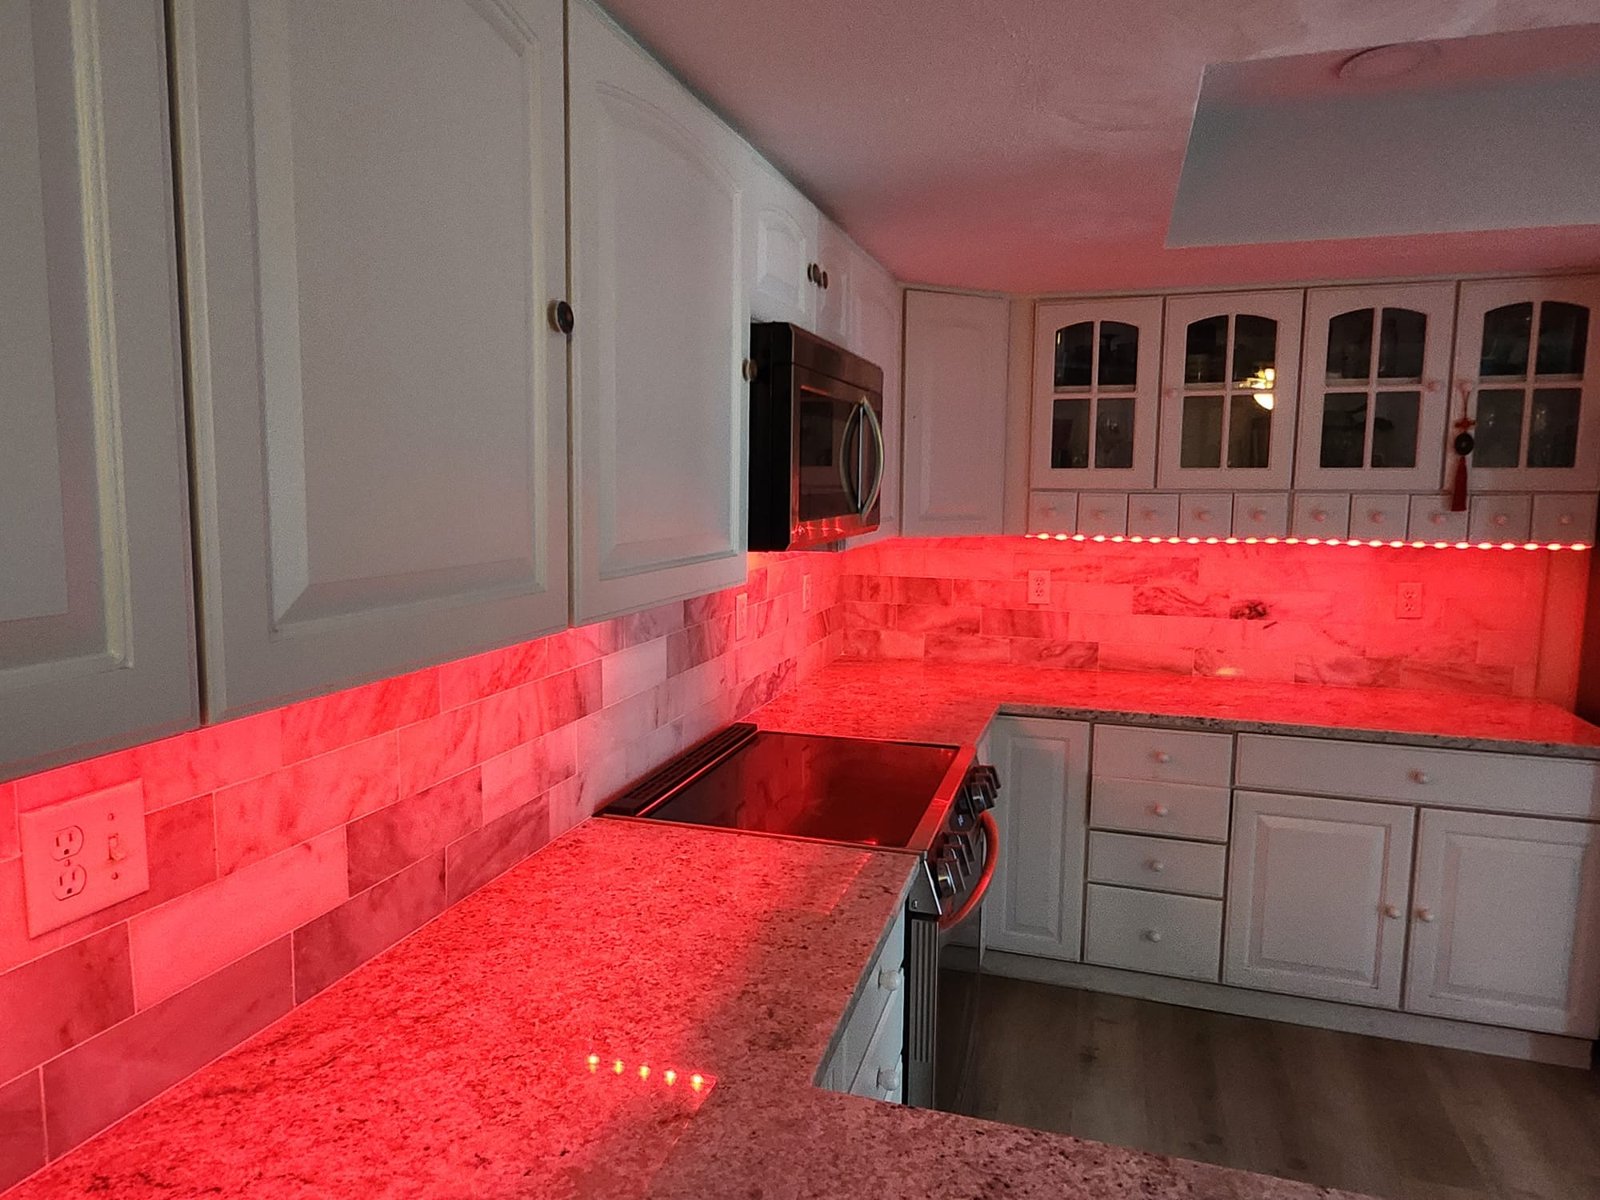
A backsplash brings the cabinets and countertop together while giving the wall behind your work area a surface that can be cleaned. The details are close enough to see every day, including the cuts around outlets, the edges beside a window and the joint along the counter. Talk with Denver Basement Finishing Pros about kitchen backsplash installation as a focused update or part of your kitchen remodel.
PLANNING YOUR INVESTMENT
The existing space and the work involved shape the estimate. Discuss your goals with us during a property walkthrough.
Material, pattern, height and exposed edges shape the finish.
Removal and wall repairs affect the installation work.
Outlets, lighting, grout and adjoining finishes complete the project.
Request a project-specific estimate for your home and planned improvements.
Request an estimate01 / YOUR KITCHEN PROJECT
Start with the finishes that will stay. The countertop usually occupies the same sightline as the backsplash, so its pattern and color deserve attention before selecting wall tile. A strongly patterned counter can sit comfortably beside a quieter wall finish. A simple counter gives a more detailed tile pattern room to stand out. Neither approach requires replacing the entire kitchen.
Look at samples upright against the wall, with the kitchen lights on. A glossy finish reflects light differently from a matte surface, and under-cabinet lighting can emphasize texture and joints. The sample should include the proposed grout color where possible. Matching grout makes individual pieces less prominent, while contrasting grout makes the pattern easier to see.
Cleaning belongs in the selection conversation. A smooth tile face, a deeply textured surface and natural stone do not have identical care needs. Confirm the selected tile's cleaning guidance and any sealing requirements before making the choice. The area behind a range collects cooking residue, so the finish needs to suit the way that part of the kitchen is used.
Material choice also affects installation. Glass, stone and larger tiles may need different setting products or preparation. The tile and adhesive instructions should agree on the proposed wall surface. A product suitable for one backsplash is not automatically suitable for every tile sold beside it.
KITCHEN INSTALLATION PLANNING
Choose the backsplash finish02 / YOUR KITCHEN PROJECT
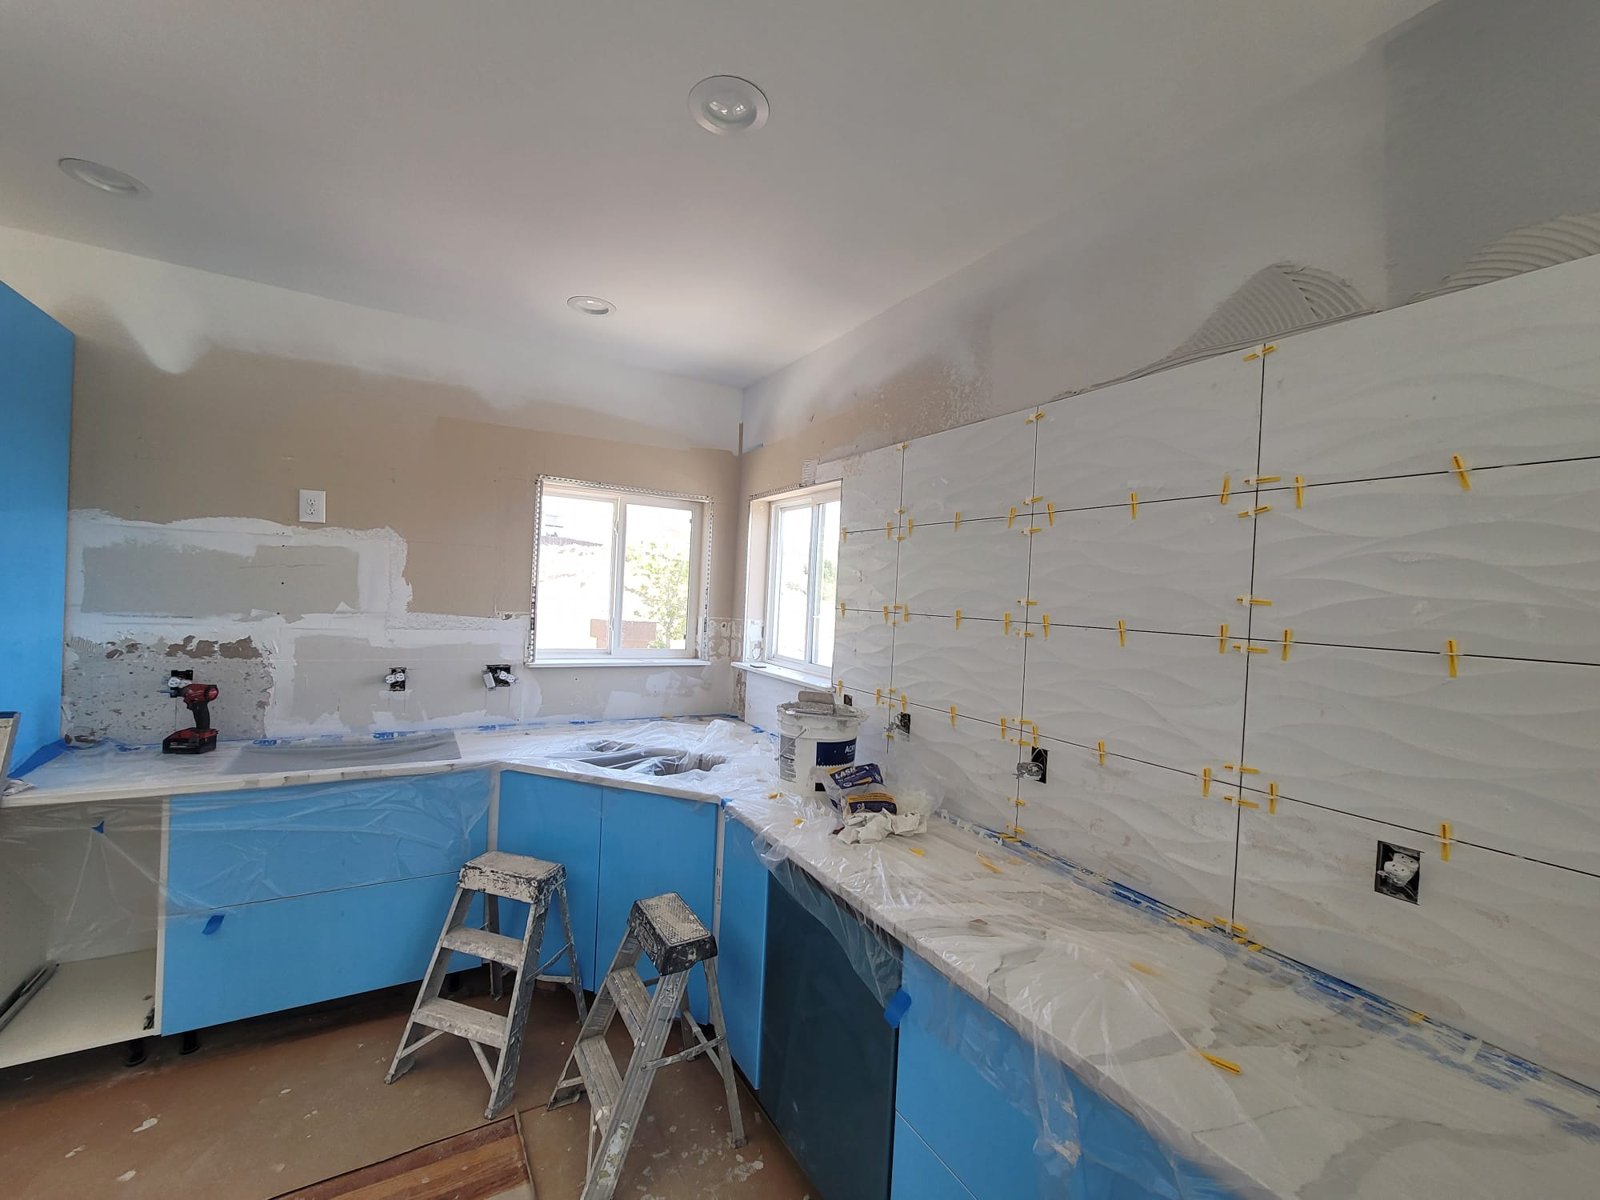
Kitchen backsplash installation begins with the condition of the wall. Old tile removal can leave adhesive ridges, torn drywall paper or damaged areas around outlets. Those areas need assessment and appropriate repair before they disappear behind a new finish. Applying tile over loose material leaves the new installation dependent on something that is already failing.
The wall also needs to be sufficiently flat for the selected tile. A visible bump can interrupt a row or leave adjoining edges at different heights. Large pieces and lighting directed across the wall can make those irregularities especially noticeable. Preparation should address the surface rather than expecting the tile pattern to hide it.
Drywall does not automatically need replacement with cement board for every kitchen backsplash. Some tile setting products permit suitable gypsum wallboard in interior dry areas. That permission is product-specific and does not make damaged, damp or unsuitable painted surfaces acceptable. The installer needs to match the wall condition and exposure to the complete installation system.
Water staining near a sink deserves a closer look before the wall is covered. A backsplash will not repair a leaking connection. Resolving the source, allowing affected materials to dry and replacing damaged material where needed protects the preparation work. Cabinets, counters and floors also need protection during removal and cutting, particularly when those finishes are staying.
03 / YOUR KITCHEN PROJECT
The layout determines where full tiles, cut pieces and visible edges will land. Starting at one end without reviewing the whole wall can leave a narrow strip in a prominent corner. A layout check considers the range, windows and cabinet runs together, then establishes where the pattern begins and how it continues around corners.
Decisions that belong in that layout include the following.
Outlets affect more than the shape of a cut. Added tile changes the finished wall thickness, and electrical devices need proper mounting and appropriate boxes or extensions. Qualified electrical work should be coordinated with the tile installation. A loose device or an oversized cover should not become the solution to an unfinished opening.
New lighting or relocated outlets should be planned before the wall is finished. Denver's residential remodel guidance includes new or relocated electrical fixtures among work requiring permits. The requirements depend on the actual scope and the jurisdiction serving the property. Coordinating electrical locations with the tile layout helps avoid cutting into a newly completed backsplash to add something that was already wanted.
04 / YOUR KITCHEN PROJECT
For a kitchen receiving new counters, backsplash work generally follows the countertop installation. The finished counter establishes the lower edge of the tile and reveals the actual wall-to-counter joint. Installing the backsplash first can leave a mismatch when the new surface arrives at a different height or position.
After preparation and layout, tile is set with products approved for the material and substrate. The installer checks alignment, spacing and the way adjoining pieces meet as the work progresses. Corners and openings need planned cuts, while exposed ends need the chosen edge treatment. These details are part of the installation rather than items to disguise with grout afterward.
Drying or curing time is a real part of the schedule. It varies with the setting product, tile and room conditions. A wall that looks complete may not yet be ready for grouting or routine use. The product instructions determine the next step, so a promised one-day finish is not a reliable assumption for every backsplash.
The work area also needs room for tools, protection and safe access. Clearing the counter allows the installation to proceed without moving small appliances repeatedly. Any range or other appliance that must be moved needs an appropriate disconnection and return plan. That coordination keeps a wall finish from becoming an avoidable interruption to the rest of the kitchen.
05 / YOUR KITCHEN PROJECT
Grout selection affects the finished appearance and maintenance. Color, joint width and compatibility with the tile surface all matter. Some delicate finishes can be scratched by an unsuitable product, and some materials require special preparation before grouting. The selected tile and grout instructions should guide the work rather than a universal rule about which grout is best.
Changes of plane need their own treatment. The joint where a backsplash meets a countertop, and the joints at inside corners, should accommodate the movement expected in the assembly. An appropriate flexible joint detail helps avoid treating every connection as a rigid continuation of the tile field. Simply filling a recurring crack again without reviewing that detail can leave the underlying problem unresolved.
Cleaning after grouting should follow the product's timing and method. Residue can dull the tile surface, but aggressive cleaning can damage a finish or disturb a joint that has not cured. Outlet covers and adjoining finishes should return neatly after the necessary work is complete. A final look under the kitchen's normal lighting helps reveal residue, unfinished edges and inconsistent details.
KITCHEN INSTALLATION PLANNING
Finish the tile connections06 / YOUR KITCHEN PROJECT
The tiled area is only part of the price. A short wall with several outlets, delicate tile and damaged drywall can involve more preparation and cutting than a larger, straightforward run. Kitchen backsplash installation should be priced around the chosen material and the work needed to leave the surrounding kitchen finished.
The main cost factors include these items.
A full-height treatment behind a range adds wall area and changes the layout. A patterned mosaic adds many joints and can require careful sheet alignment. These choices are worth discussing together with the overall finish, so the design and installation approach are settled before materials are ordered.
An accurate project price needs the wall dimensions, material selection and a review of existing conditions. Contact Denver Basement Finishing Pros to discuss the backsplash you have in mind.
KITCHEN INSTALLATION PLANNING
Plan the complete backsplash07 / YOUR KITCHEN PROJECT
Once the installation is ready for use, follow the care instructions for the tile, grout and sealant. Not every surface needs sealing, and a cleaner suitable for one material may damage another. Keep the product information with the kitchen records so future cleaning or repairs do not depend on guessing what was installed.
Wipe cooking residue and splashes using the approved cleaning method rather than allowing buildup to become harder to remove. Check the countertop joint during normal cleaning. A separation, recurring discoloration or loose tile deserves attention to the cause instead of another layer of caulk over the problem.
The final walkthrough is a useful time to review exposed edges, outlet covers and the appearance of the surface under ordinary lighting. It should also establish when normal cleaning can begin. Those small completion details help the kitchen return to everyday use with the wall finish and adjoining surfaces working together.
BEFORE YOUR PROJECT BEGINS
Sometimes, but the paint, wall condition, tile and setting product must be compatible. Loose paint, grease and damaged paper need attention. An approved drywall application is not permission to tile over every painted surface without preparation.
New countertops generally come first. Their finished position establishes where the tile begins. Keeping that sequence helps avoid an awkward gap or cutting the new backsplash when a replacement counter changes the height.
Yes, sound cabinets and counters can remain during a focused backsplash update. Protection, removal access and wall repairs still need planning. The new tile should meet the retained finishes cleanly, including the exposed ends of the cabinet runs.
Do not assume that tile and grout create a waterproof wall assembly. The installation needs to suit the area's exposure, and a leaking sink connection still requires repair. A kitchen backsplash and a shower wall are different applications.
It can change how their light reflects and how clearly tile texture appears. Existing fixtures may also affect access during the work. Review lighting placement and any wiring changes before installing tile, especially when adding a new lighting system.
That depends on removal, repairs, installation and the products' curing requirements. Ask for the work-area restrictions as part of the schedule. A completed-looking wall does not necessarily mean the surface is ready for cleaning or normal use that evening.
LET’S TALK ABOUT YOUR HOME
Tell us what you have in mind. We’ll discuss your goals and arrange a walkthrough to understand the work involved.